


We'd heard about macros in our first few Alteryx sessions so we roughly knew what they were but learning how to make them was so fun!
The Basics
A macro is a workflow or group of tools built into a single tool that can be reused in another workflow. Instead of rebuilding the same workflow, you can reuse the macro saving you lots of effort. Some of the tools we already know and love are actually macros such as Count Records!
Before diving into the instructions, have two canvases open so that you can create and edit the macro in one and test out the macro in a workflow in another.
General Macros
One of the first macros we built was a "promoting headers" macro. We started with our main workflow where we inputted data where the headers started on the fifth row.
In the macro building workflow we copied in this data to create the macro off of.
- Text Input tool to paste in data (where the headers started on the fifth row).
- Select Records tool which selects rows based on their position in the dataset. In this case we put 5+ to return everything from the 5th row onwards.
- Dynamic Rename tool to promote the headers to the first row.
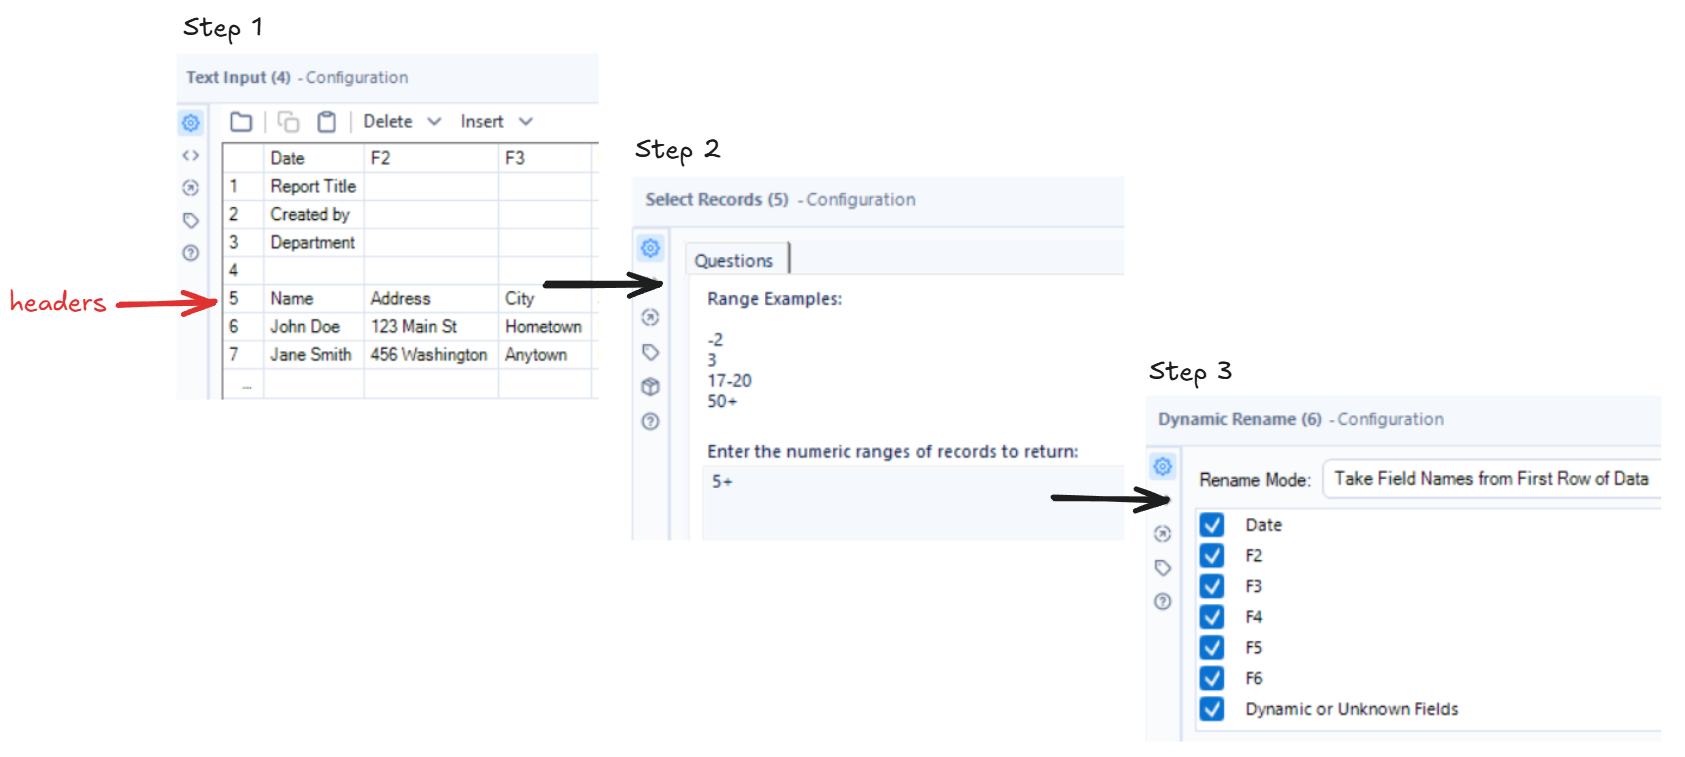
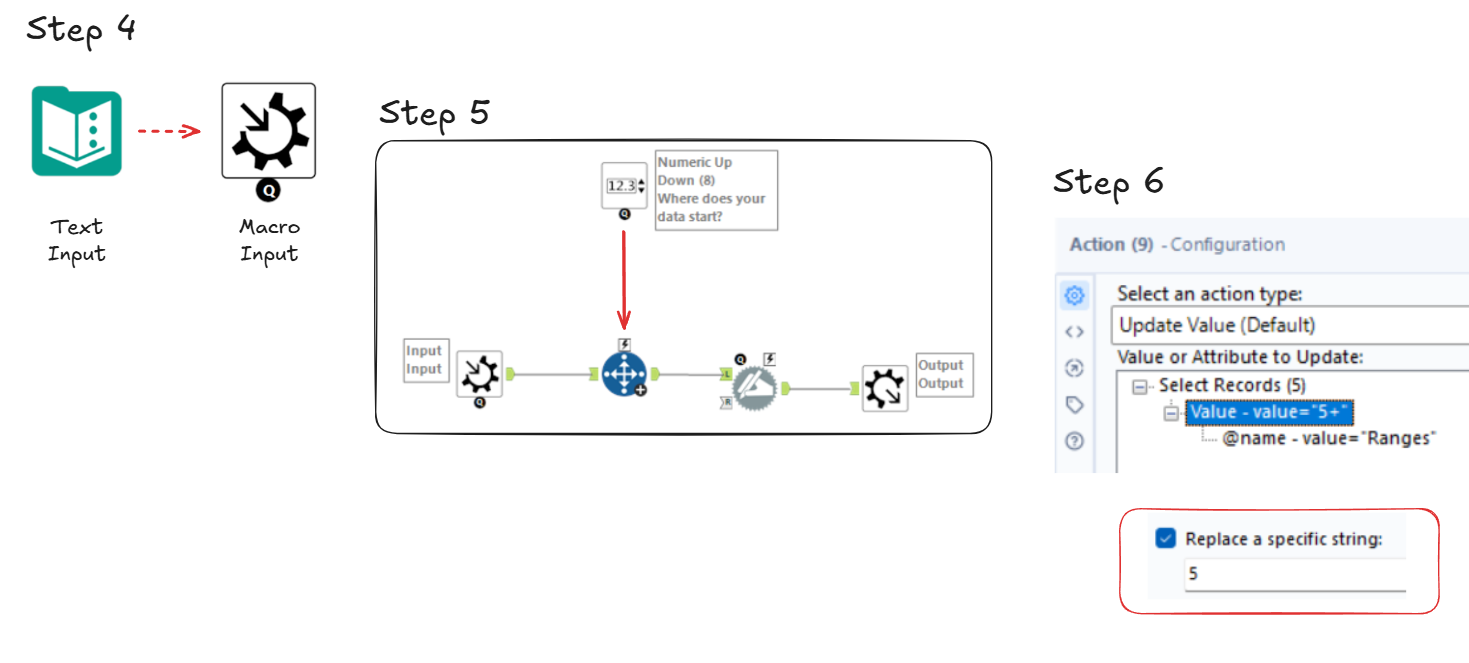
- Convert the Text Input tool to Macro Input and add a Macro Output at the end of the flow.
- Use the Numeric Up Down tool and enter a question for the user e.g. "Where does your data start?" and connect it to the Select Records tool.
- Set the action to update value and select the value (we used 5+ earlier) and tick "replace a specific string" and just put 5 so that it keeps the + sign.
- Save the macro and go back to the other workflow.
Once the macro has been added back in it will now ask the user the question we inputted earlier when the workflow is run. The user can then say what row the data starts on and we can see in the output that the headers have now been promoted and the data has been cleaned!
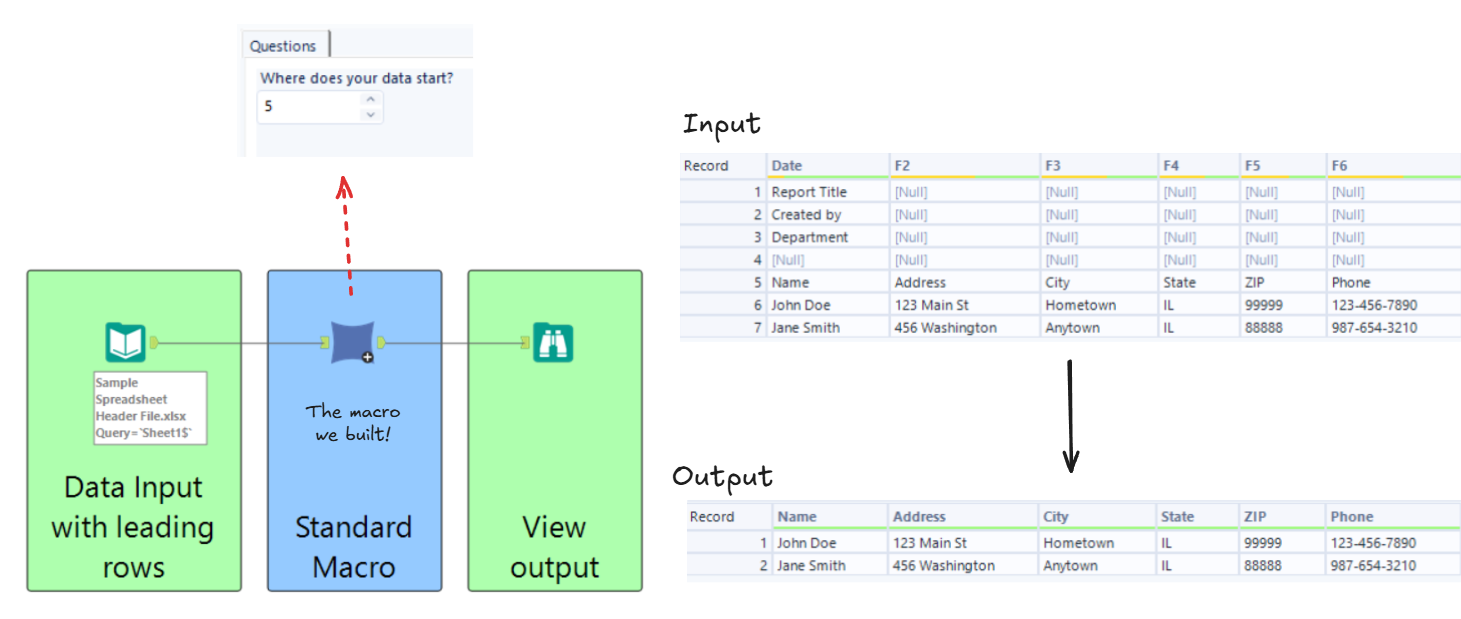
This macro is only made up of a few tools but even so it demonstrates what we can use macros for. Now you can reuse this macro and promote the headers for lots of datasets very easily!